How to Use the Bus Feature
The Bus feature enables flexible audio routing between effects, allowing more complex and versatile audio processing.
Basic Concept
- Each effect allows you to specify an Input Bus that receives the audio signal to be processed, and an Output Bus that outputs the processed audio.
- By default, if not specified otherwise, each effect uses Main bus for both input and output.
- Up to four additional buses (Bus 1 to Bus 4) can be used.
Setting Input and Output Buses for Effects
- Click the Routing button located to the left of the up/down buttons displayed on each effect.
- Clicking the Routing button opens a settings dialog, allowing free selection of the Input Bus and Output Bus from Main or Bus 1 to Bus 4.
- Changes take effect immediately.
-
To close the dialog, click the × button at the top-right corner or click outside the dialog.
- If either the input or output is set to Bus 1 or higher, “Bus X→Bus Y” will be displayed next to the Routing button.
- Example: When processing audio from Bus 2 and outputting it to Bus 3, it will show “Bus 2→Bus 3”.
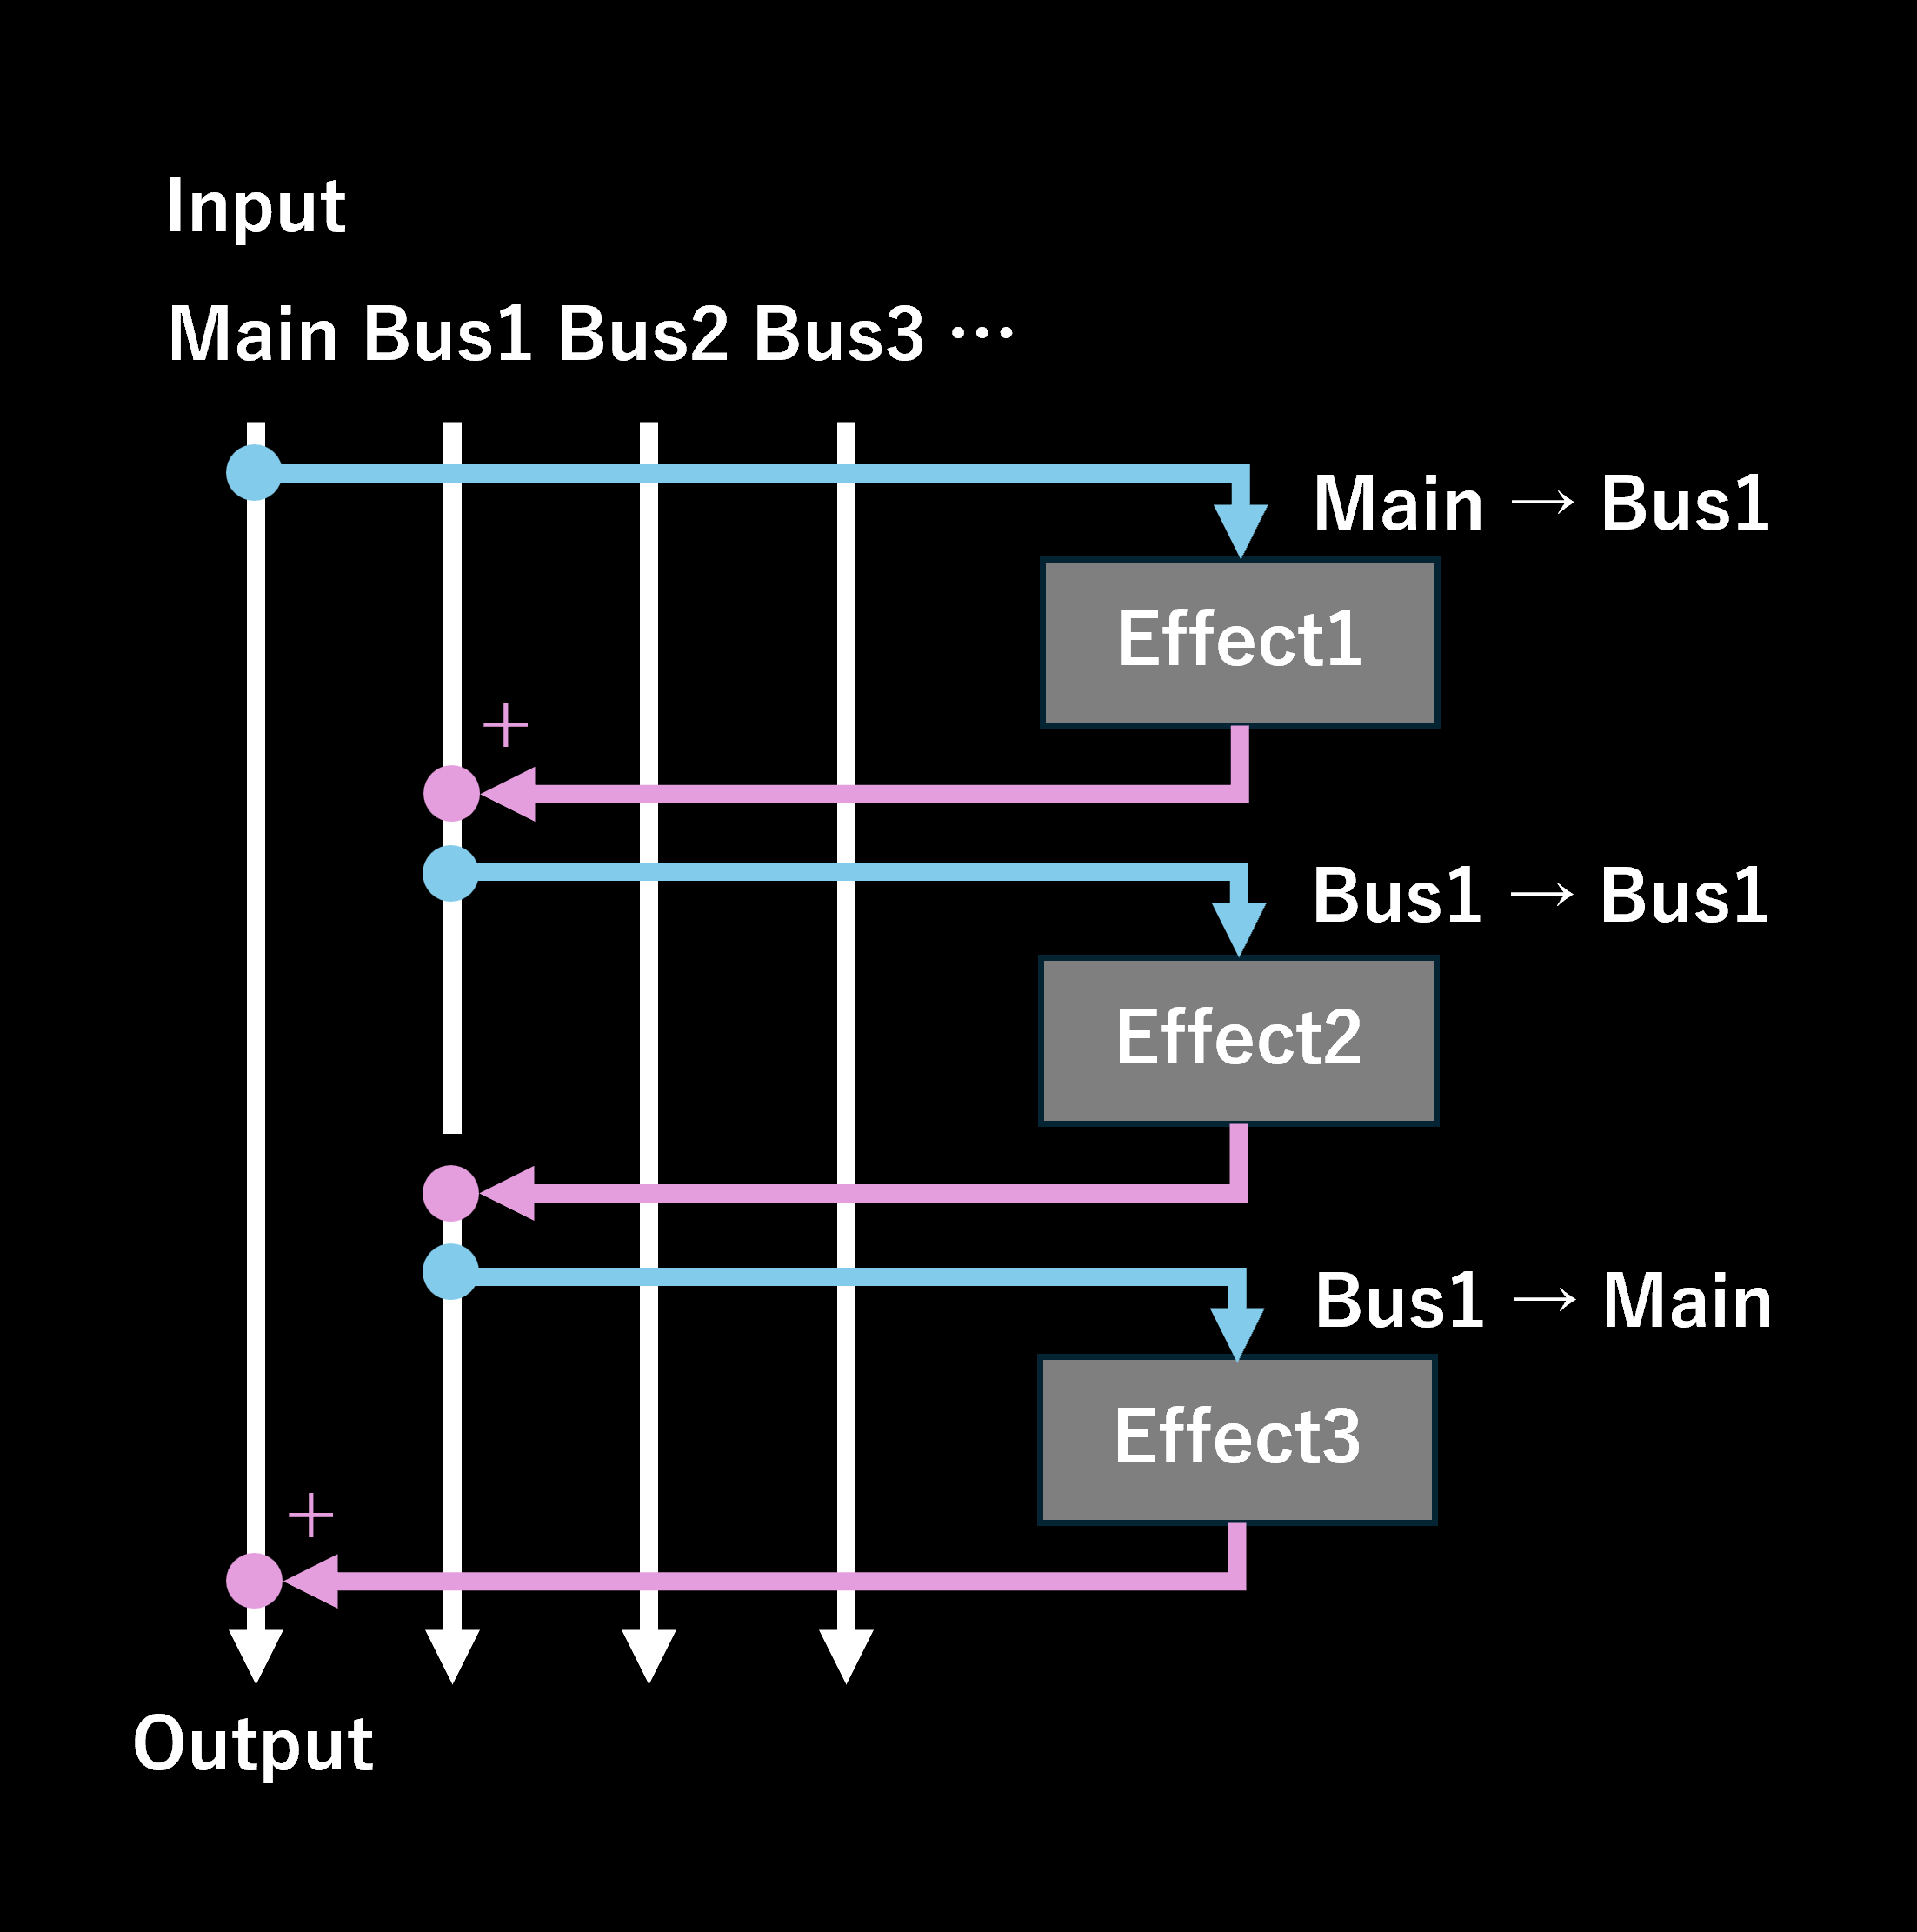
Audio Processing Mechanism
- Effects are processed sequentially from top to bottom.
- Each effect takes audio signals from the specified Input Bus, processes them, and sends the result to the Output Bus.
- If an Input Bus is used for the first time, processing begins from silence.
- If the Input and Output Buses are the same, the Output Bus audio is overwritten by the processed result.
- If different buses are specified for input and output, the processed audio is added to the Output Bus.
- Ultimately, audio playback is always from Main bus.